| Banner Manager | Last Update: 20th September, 2005
Article ID: 148 |
- Introduction
- Banner Manager
- General Banner Settings
- Adding Image Based Banners
- Adding HTML Based Banners
- Displaying Banners
- Displaying Random Banners
- Displaying A Specific Banner
Introduction
The Banner Manager is a simple banner management implementation that displays image or HTML based banners, and tracks impressions and clicks on a per banner basis.
Each banner is assigned a group which is used for displaying random banners in the set group. This allows certain banners to be shown throughout certain locations on the overall web site layout.
Banner Manager
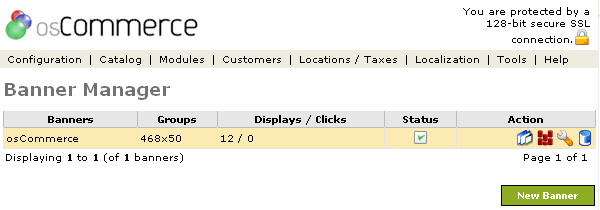
Figure 1 shows the
Banner Manager listing page under the Admin>Tools>Banner Manager section.

Figure 1. Banner Manager listing page under the Admin>Tools>Banner Manager section.
To edit the details or move a folder click on one of the editing tools under the "Action" column next to the "Title" being edited. To remove click the blue trashcan.
General Banner Settings
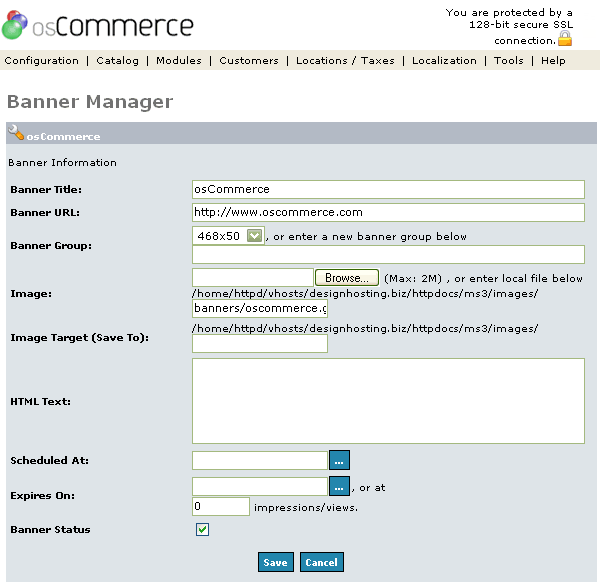
Figure 2 shows the Banner Manager Edit listing page under the Admin>Tools>Banner Manager>Edit section.

Figure 2. Banner Manager Edit listing page under the Admin>Tools>Banner Manager>Edit section.
Banner Title
The banner title description.
Banner URL
The destination taken to when the banner is clicked on.
Banner Group
The banner group which holds related banners.
Scheduled Date
A future date when the banner is to become active. If no scheduled date is defined, the banner is automatically active when saved.
Expiration Value
The expiration value can be set for a specific date or for a specific impression count value. When this value has been reached, the banner will automatically become inactive. If no expiration value is defined, the banner will always remain active.
Adding Image Based Banners
Banner images can be uploaded to the server via the Banner Manager, or can be set to an image already existing on the server. If an image is to be uploaded, a destination path on the server can be defined which needs to be writeable by the web server.
The general permission setting to set on the destination directory is 777, and can usually be set remotely on the server with the following command:
chmod 777 /path/to/destination/directory
or by using an FTP program and setting the directory to be writeable by everyone.
Image based banners use the Banner URL value to redirect to when the banner has been clicked on
Adding HTML Based Banners
HTML based banners can be defined in the HTML Text field provided, and can, for example, contain HTML and Javascript tags to display a text, image, or Flash based banner.
HTML based banners do not automatically use the Banner URL value and rely on a link provided in the HTML block. Because of this, it may not be possible to track the banner-click statistic of a HTML based banner unless the link points to the banner entry itself, such as:
http://www.my-server.com/redirect.php?action=banner&goto={BANNER_ID}
(where {BANNER_ID} is replaced with the banner ID)
Displaying Banners
Banners can be displayed by either selecting a random banner in a banner group, or by directly requesting an ID to a banner.
Displaying Random Banners
Random banners can be displayed by requesting which banner group a banner should be selected from, and can be done with:
<?php

  echo tep_display_banner('dynamic', '468x50');

?>
The dynamic parameter value instructs the tep_display_banner() function to select a random banner from the 468x50 banner group.
Displaying A Specific Banner
A specific banner can be displayed by requesting the specific banner ID, such as:
<?php

  echo tep_display_banner('static', '1');

?>
The static parameter value instructs the tep_display_banner() function to select the banner with the ID value of 1.

